For more details on creating a model, see Creating a model in Blender.
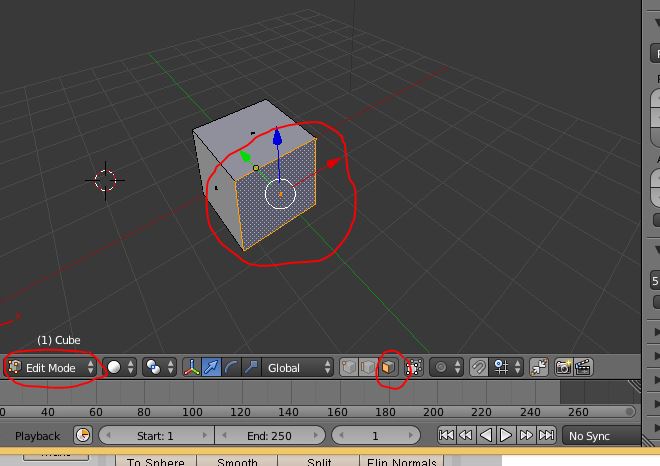
We will do a very simple model for this example -- an inchworm! Starting with our friend the initial cube in blender, go to
edit mode, switch to face selection, and select any face:
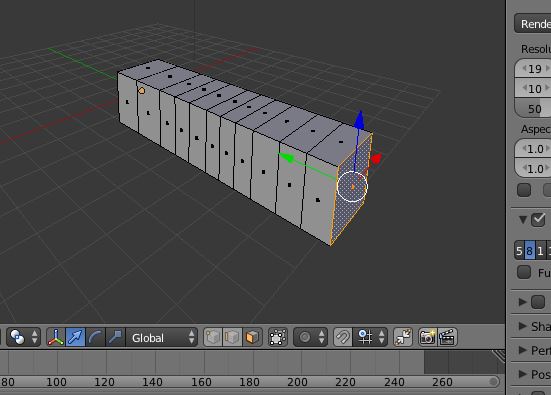
Press 'e' (for extrude, you can instead select Mesh->Extrude->Extrude Region from the menu), and move the extruded face
over a bit. Repeat until you have a nice worm. Be sure to extrude your worm in a straight line, we will bend the worm
with our animations.
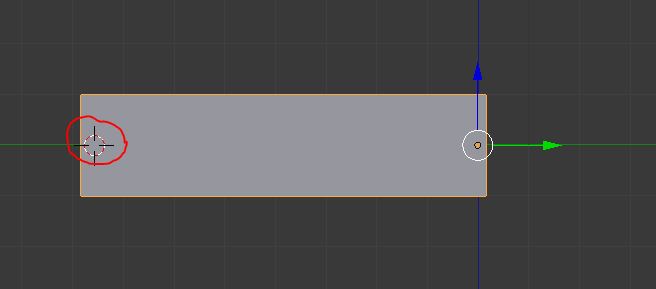
Now we are ready to add a skeleton, or armature, to use in animating the object. First, let's put the selection
marker on the worm, by left-clicking in the scene. To place the marker correctly in 3-space, it is usually easiest to
left click, then chance the view (using the number pads or by mousing around with the middle mouse button) and left click again.
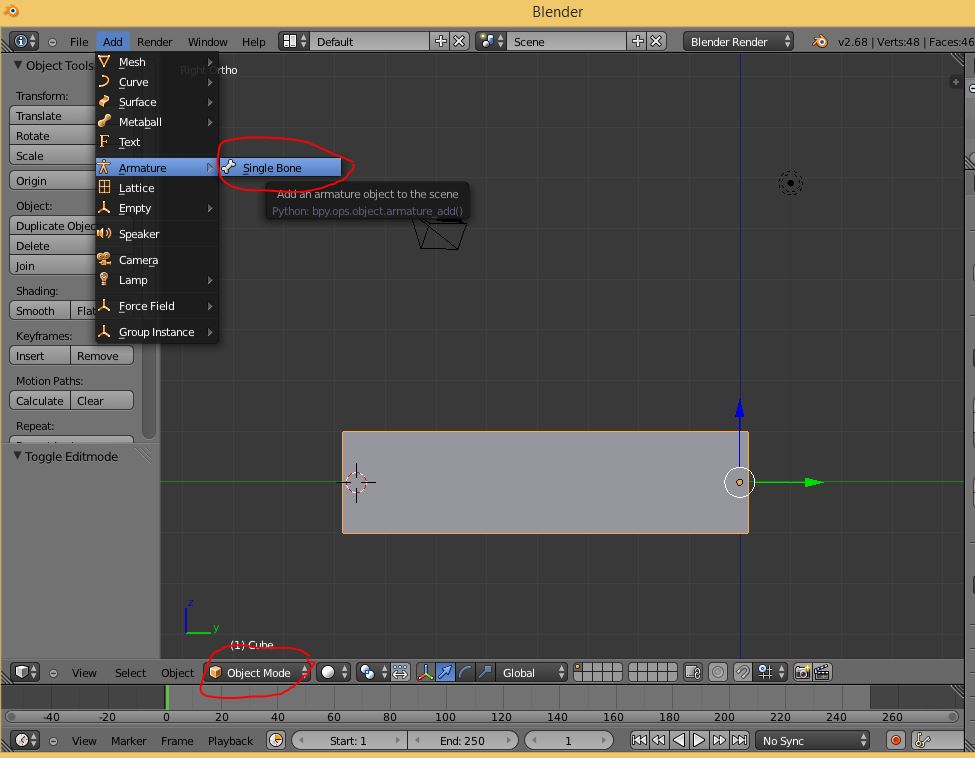
Make sure you are in object mode (not edit mode), and select add Add->Armature->Single Bone
Hmm... we don't seem to see anything. That's because the bone is inside our model. In the outliner (upper right panel
by default), select the armature. Then, in the property panel, select the object pane (little cube), scroll down to
the display group, and click X-Ray
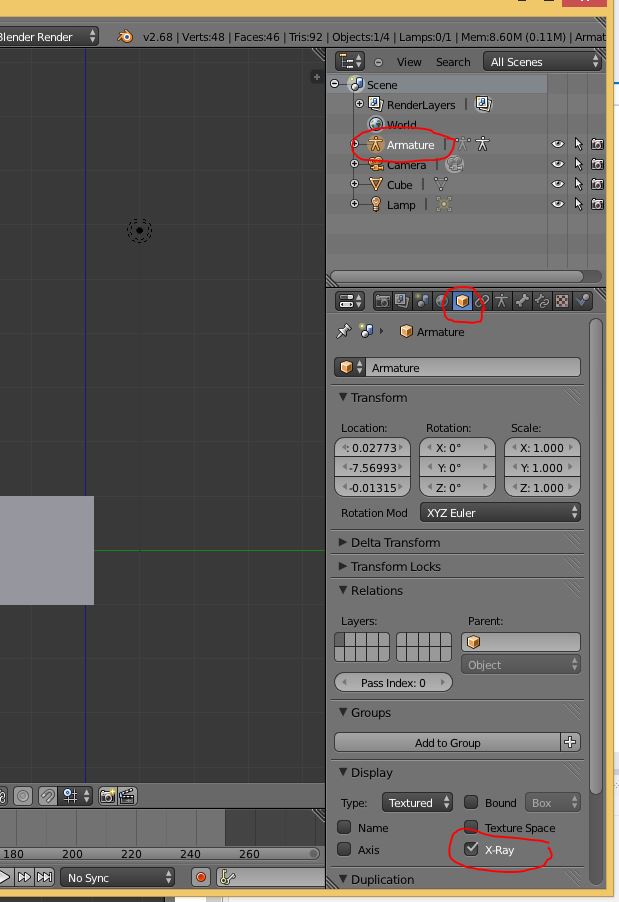
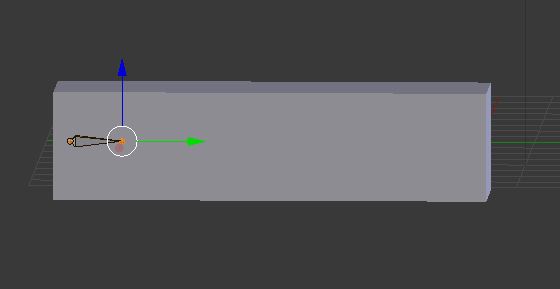
Now we can see the bone. Move it around until it is in line with the model. Move the pointy part of the bone until it
is the correct size
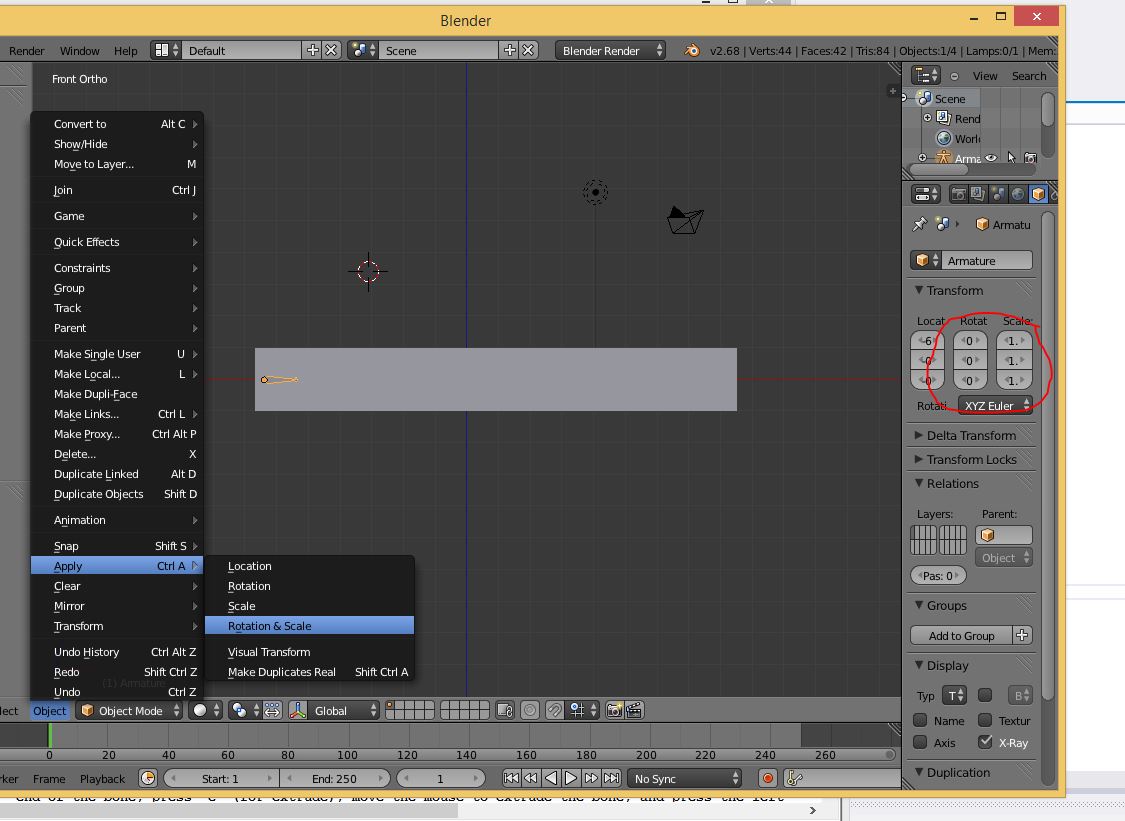
We need to apply this transformation. In Object Mode, with the bone selected, press ctr-a, and apply rotation and scale. This
will have no visible effect in blender, but it will be required for export. You can check to make sure that the
transformation has been applied correctly in the properties pane -- rotation and scale should be zero. (What is going
on is this: Blender stores the local position of each vertex &etc in model space, and then also stores
a transformation matrix for the entire model itself. When bender displays the model, it uses this transformation
matrix. When it exports the model, it does not. So, to get the blender visuals to match what Ogre can see, we
apply this transformation matrix to the model itself.)
Select the "pointy" end of the bone, press 'e' (for extrude), move the mouse to extrude the bone, and press the left
mouse button to when you are done.
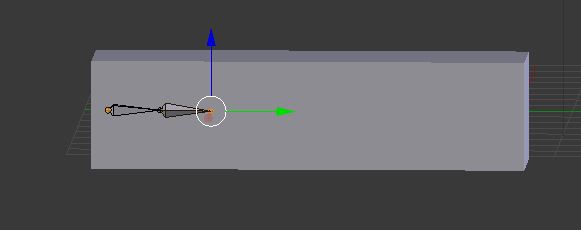
Keep extruding bones until you have a nice skeleton within your worm.

At this point, the armature is not paired to our object. They happen to be close to each other in space,
but there is no relationship between them. We need to parent the worm mesh to the armature. Before we do this,
we need to make sure that all transformations have been applied to the mesh. In object mode, select the mesh
and make sure the rotation, location, and scale are zero. If not, just press ctrl-a to apply, as with the
armature.
While in object mode,
select first the mesh (you can do this in the outliner) and then the armature (shift-click) and parent the object to
the armature with automatic weights.
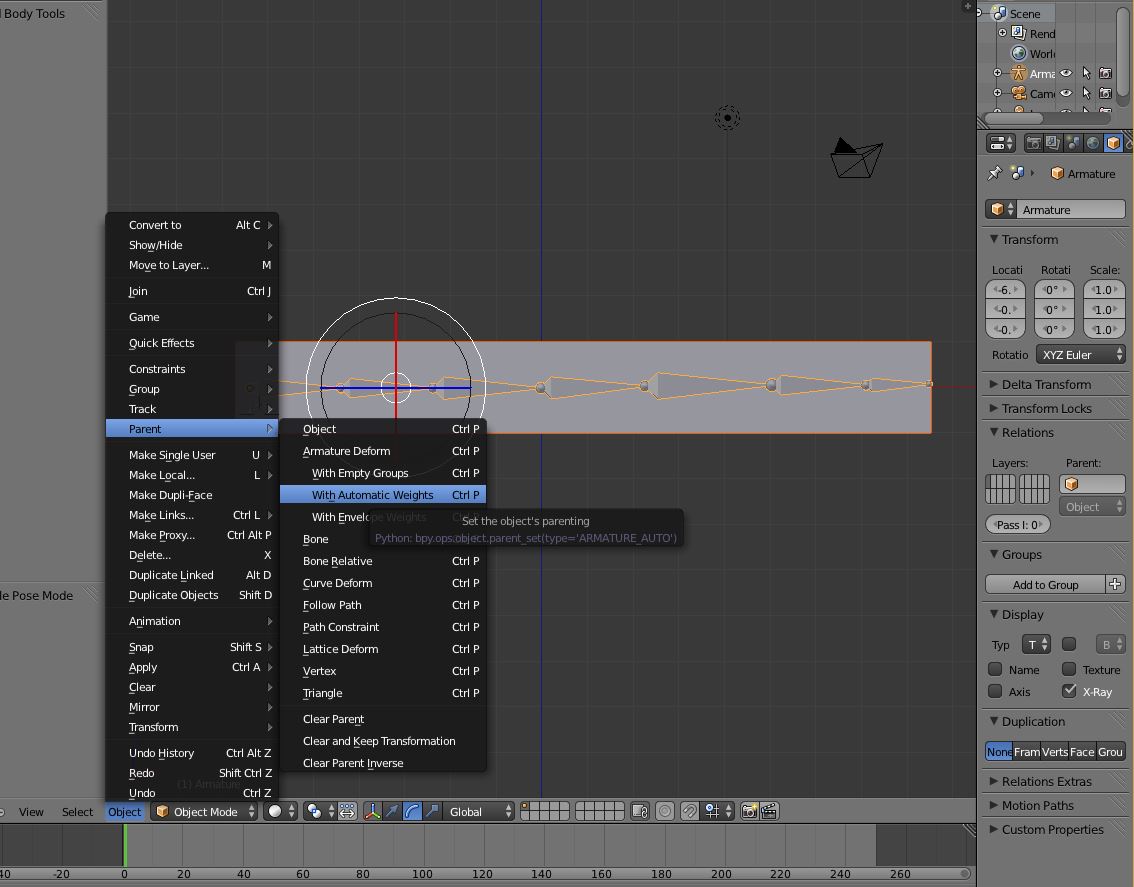
When parenting an armature to a mesh, the system needs to know which vertices in the mesh are controlled by which bone. A particular vertex can be controlled by more than one bone (with different bones having a weighted influence). If we were doing this the "right way", we would create vertex groups, and have each bone control a different vertex group. (An example of how to do this using an older version of blender can be found here. Note that the older version of blender uses an older animation exporter, and animations are handled in a slightly different way) Let's be lazy and have blender do it for us, using proximity to determine what bone controls each vertex.
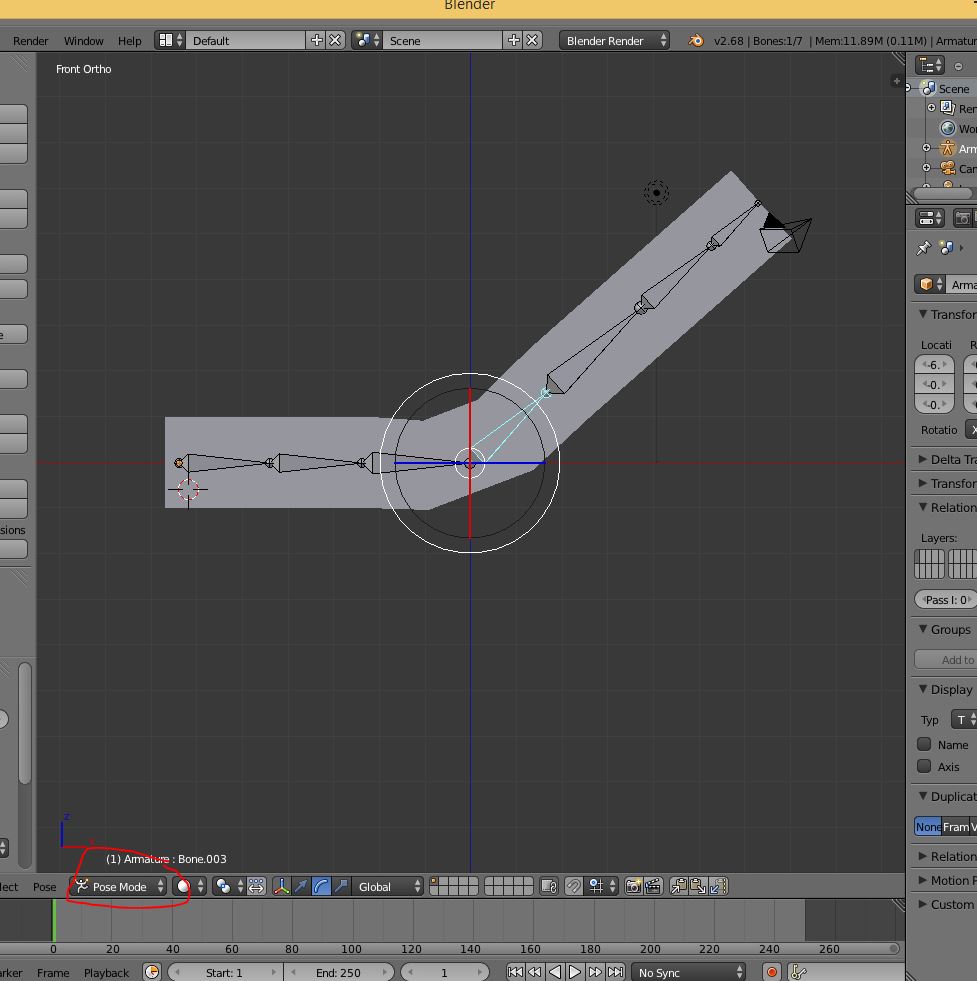
Select the armature, and then go to pose mode. Rotate one of the bones to make sure the armature has been
applied to the model
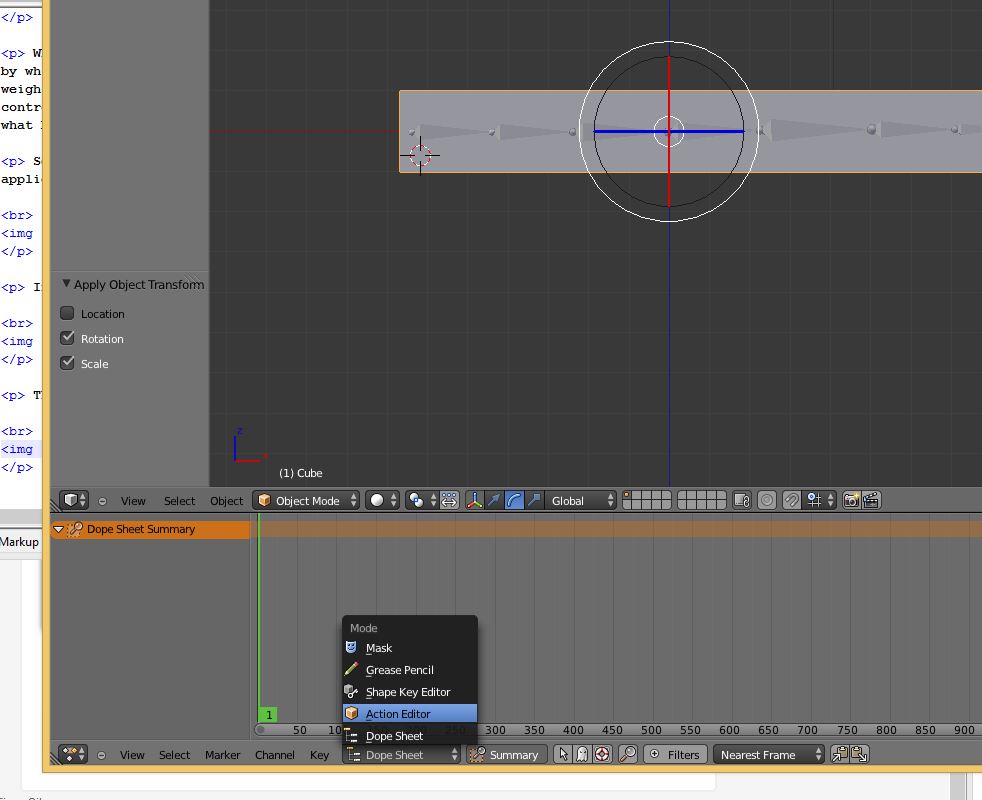
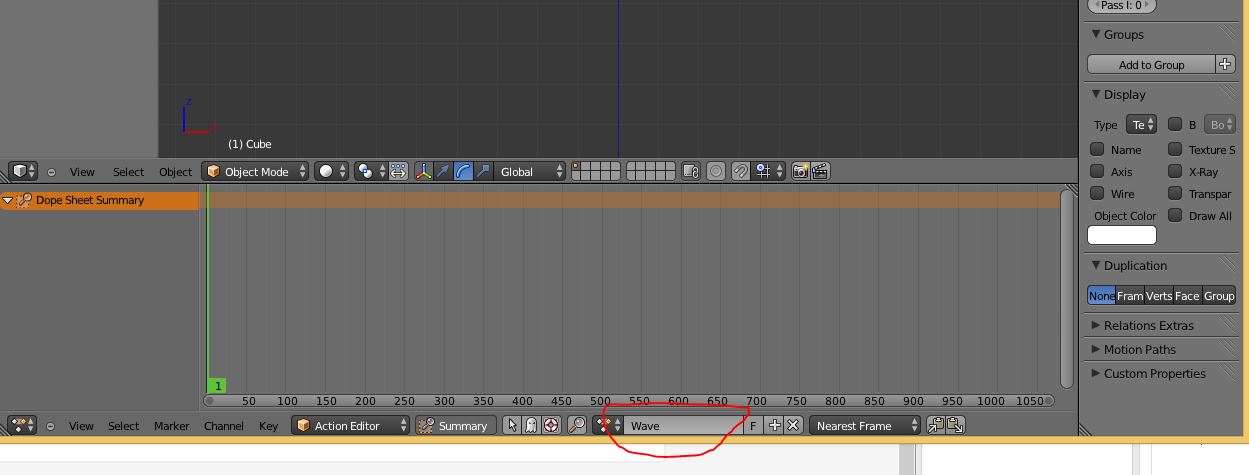
In the bottom plane, switch to the Dope Sheet editor

Then switch to the action editor
Click on the new button to get a new action
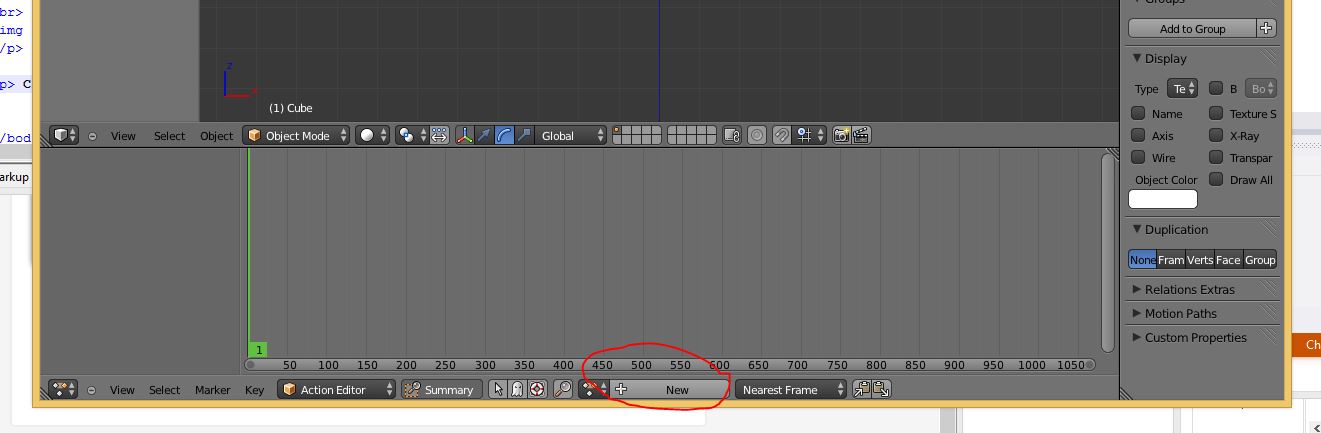
Then click on that same button (now named "Action") to rename it something useful, like "Wave"
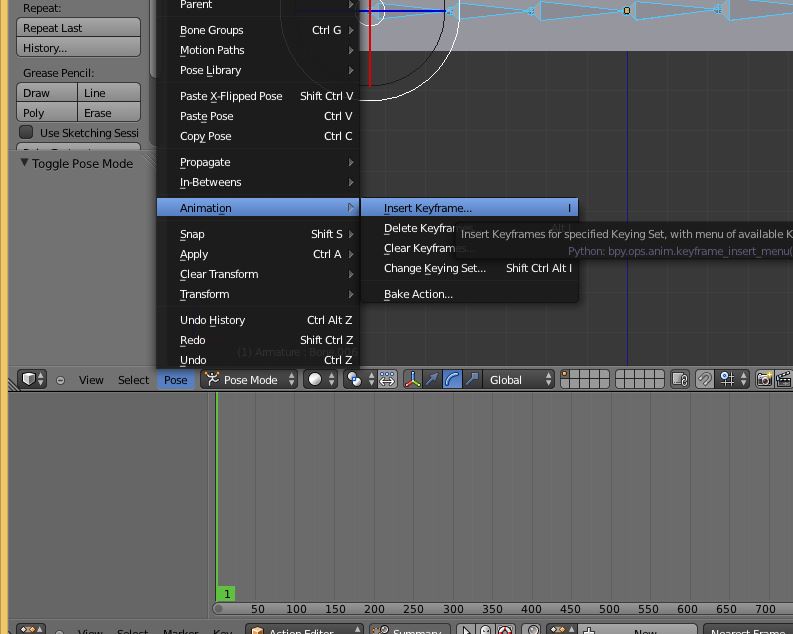
Make sure the armature (and all bones!) are selected and we are in pose mode. Then press 'i' to insert a keyframe (or select insert keyframe
from the pose menu
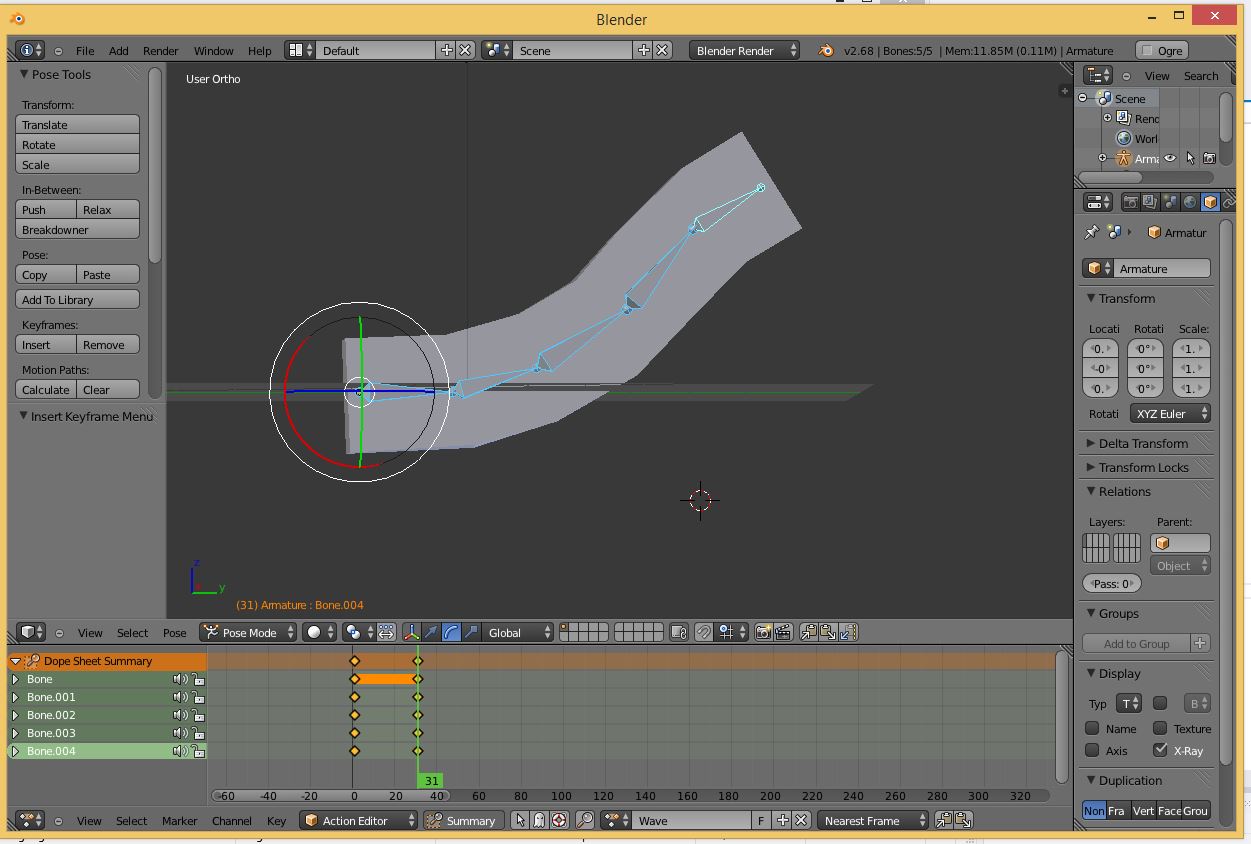
Move the timeline over a few frames -- say, 20 or so, and rotate some of the bones, and insert a new keyframe
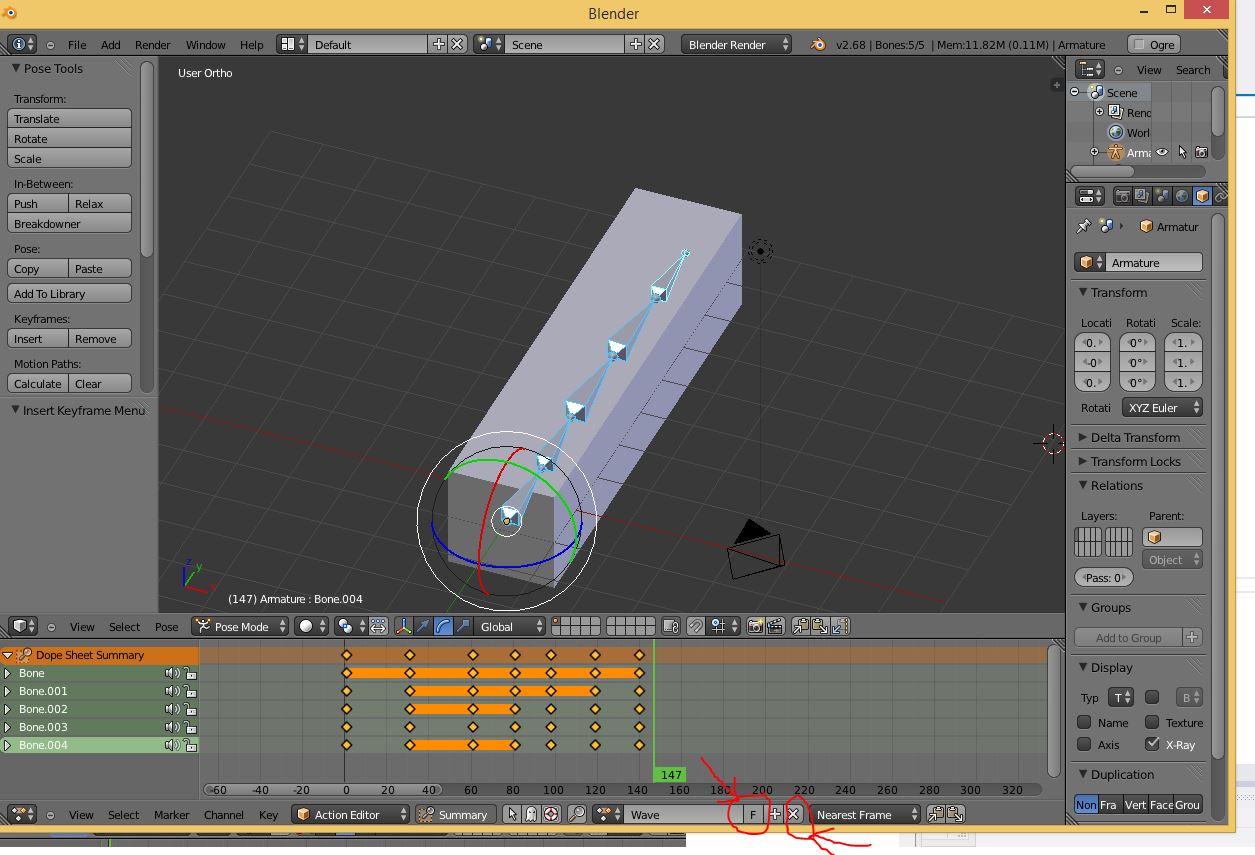
Continue until you have a nice animation. When it looks good, then click on the F buttons by the action name (so that
this animation will be saved when we clear it), and then click the X button to clear the animation (so we can do another one)
Repeat the process to create more animations if you like. Then, switch to the NLA editor
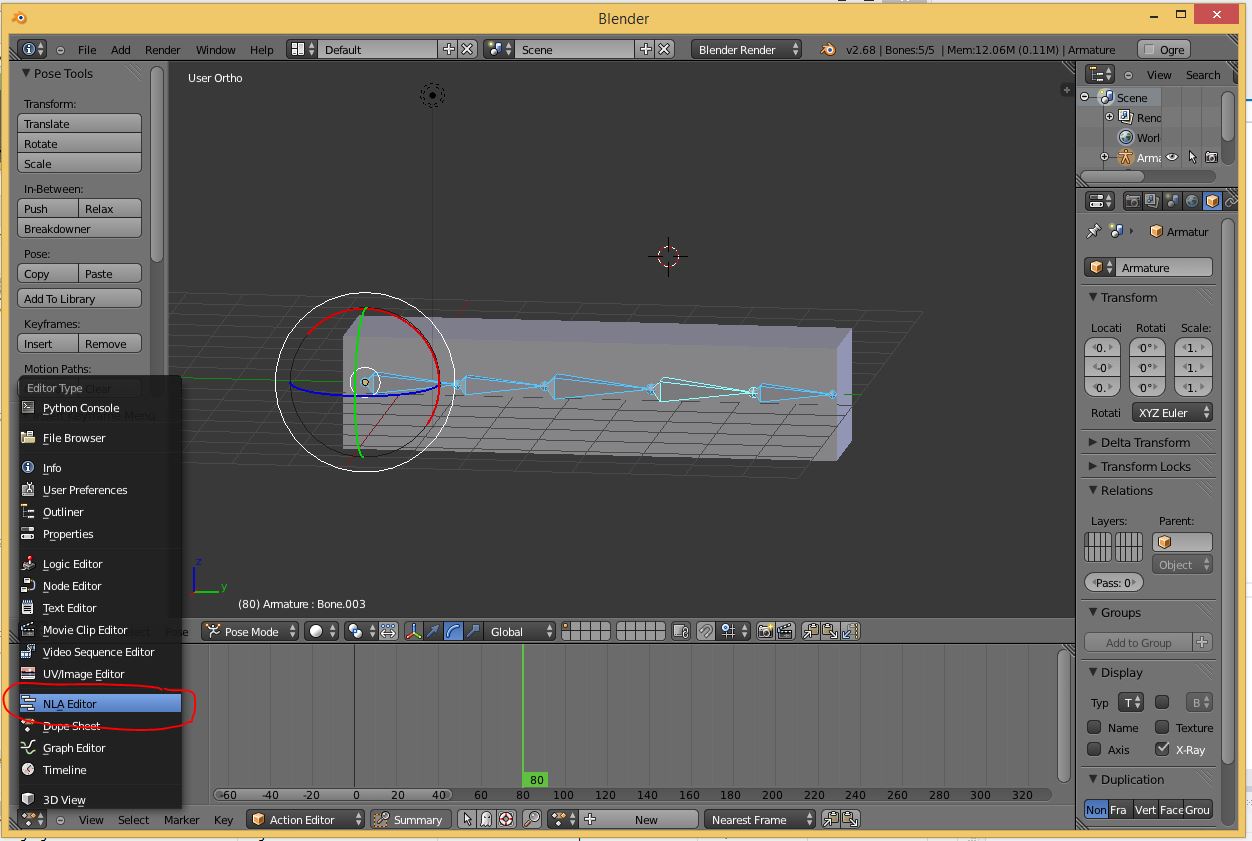
Add a new track
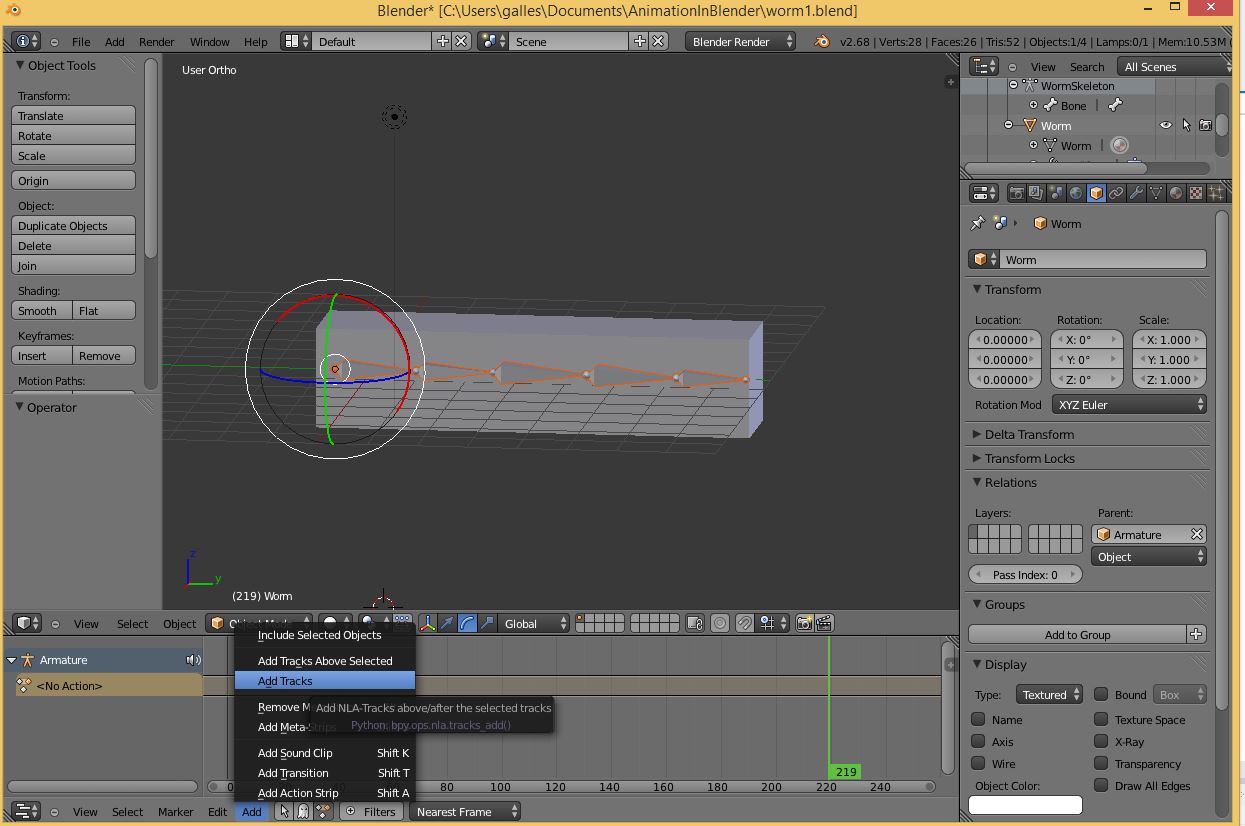
Then add an action strip

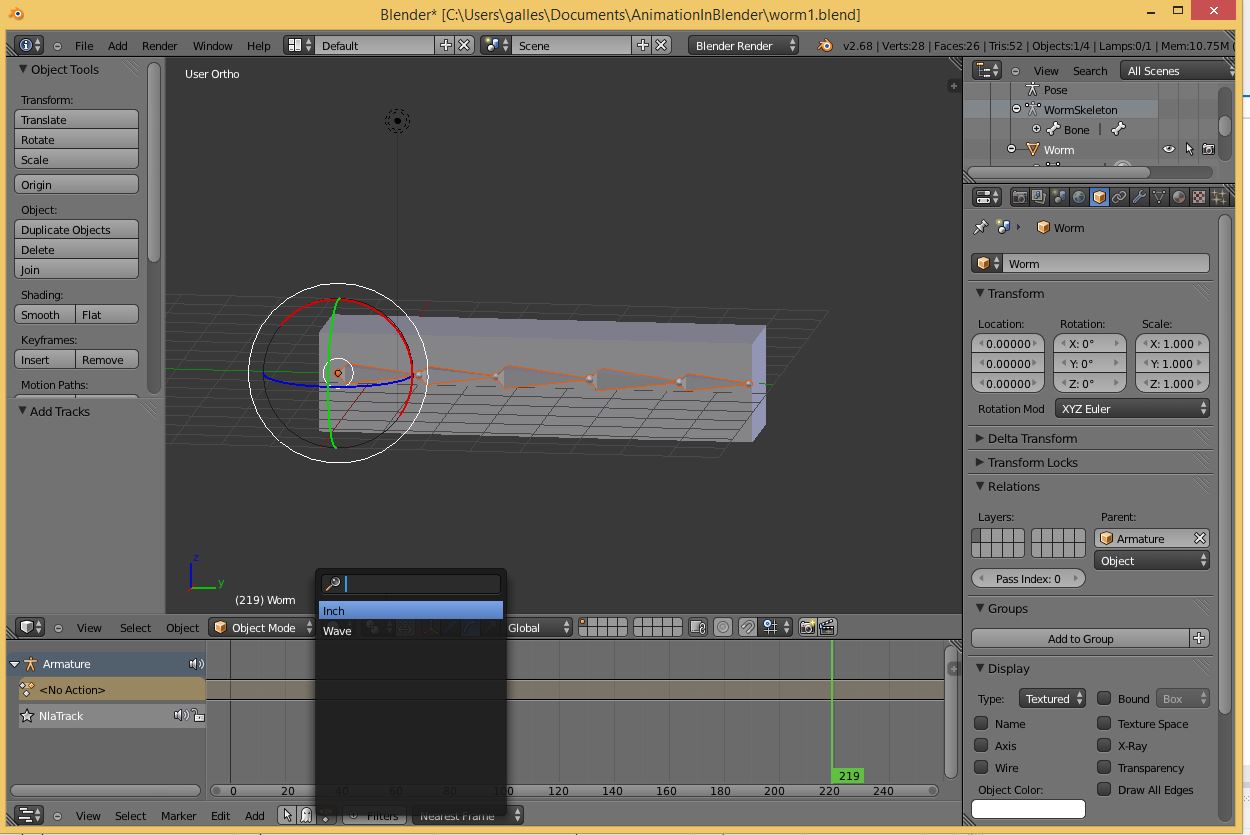
If you have additional animations, add a new track, move the green animation timeline to the end of the previous animation
and add a new animation to the timeline
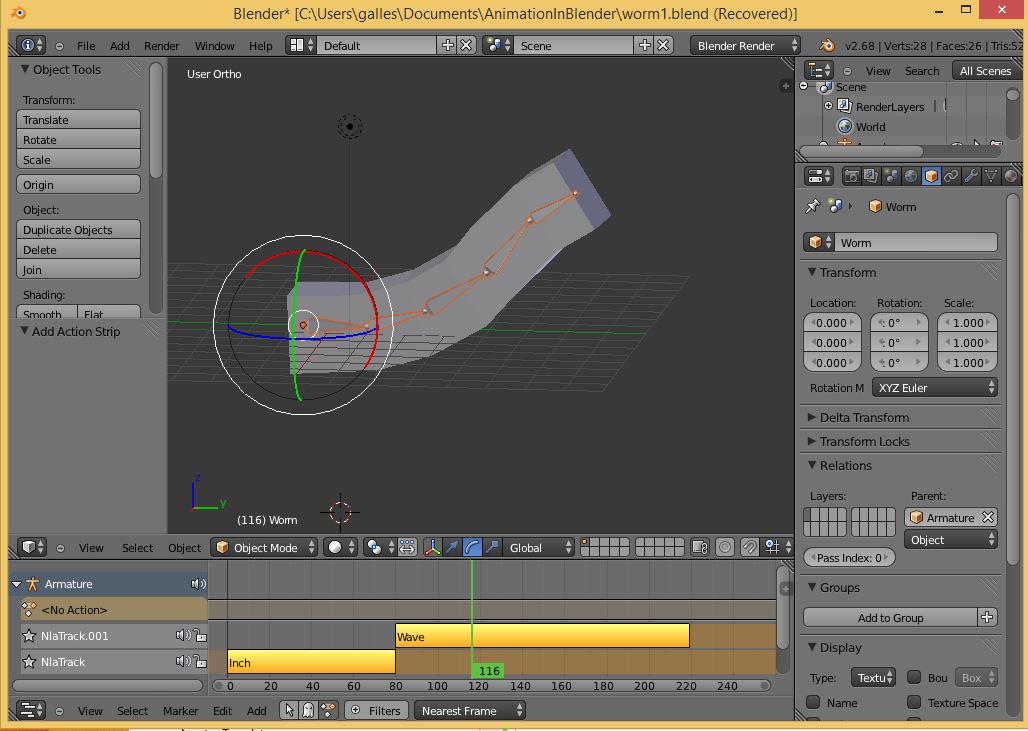
Scrub the timeline back and forth across both actions, and make sure that they both do what you want. Then, export everything, and copy the .mesh and .skeleton files to the appropriate locations in the content folder that Ogre can see (I prefer to place both the skeleton and the mesh in the Models folder, but anywhere Ogre can see them is fine
Now, we are ready to use the animations in Ogre. Create the Entity and scene nodes as normal. Here, we are creating two objects so we can show off two animations at once
    mInchwormEntity = mSceneManager->createEntity("worm.mesh");
    mIncrwormNode = mSceneManager->getRootSceneNode()->createChildSceneNode();
    mIncrwormNode->attachObject(mInchwormEntity);

    mInchwormEntity2 = mSceneManager->createEntity("worm.mesh");
    mIncrwormNode2 = mSceneManager->getRootSceneNode()->createChildSceneNode();
    mIncrwormNode2->attachObject(mInchwormEntity2);
Next, get at the animation state for each entity, and enable the appropriate animations. You can have more than one animation active for each entity, with different weights per animation. We will be simple and just have a since animation per object, that controls it completely
    mInchwormEntity->getAnimationState("Inch")->setEnabled(true);
    mInchwormEntity->getAnimationState("Inch")->setLoop(true);
    mInchwormEntity->getAnimationState("Inch")->setWeight(1.0);

    mInchwormEntity2->getAnimationState("Wave")->setEnabled(true);
    mInchwormEntity2->getAnimationState("Wave")->setLoop(true);
    mInchwormEntity2->getAnimationState("Wave")->setWeight(1.0);
Finally, in the think method for each object, call addTime to move the animation forward
void
World::Think(float time)
{

    // Do other stuff

    Ogre::AnimationState *st2 = mInchwormEntity->getAnimationState("Inch");
    st2->addTime(time);
    Ogre::AnimationState * st = mInchwormEntity2->getAnimationState("Wave");
    st->addTime(time);
}
Now for the fun part! Creating a model, rigging it, animating it, exporting to ogre. Here's what you should do: