GUI systems
If you are designing a GUI, you usually want separation beween the code that manipulates the GUI elements (drawing buttons, managing sliders, detecting clicks, etc) and the functional code behind the GUI (what your application actually does.) The way this is usually done is with callbacks -- you tell the GUI which methods / functions you want to call when specific events (buttons, slider movements, etc) occur. The GUI manager then deals with all the low-level stuff (mouse events, keyboard presses, etc), and calls the appropriate callbacks when high-level operations are done (pressing buttons, etc).
GUIs in Java
In Java, this is done using using Listeners. For example, assume that you have a button in your GUI, and you want something to happen when the button is pressed. First, you create a class that implements the ActionListener interface:
  public interface ActionListener
  {
       public void actionPerformed(ActionEvent e)
  }

  class HandleButtonPress implements ActionListener
  {

       public void actionPerformed(ActionEvent e)
       {
            // Deal with the button press.
            // The ActionEvent tells us something about
            // what event actually occured.
       }
  }
We then add this button pressing handler to the button, and we're all set.
   JButton myButton = new JButton("Button Text");
   // Add myButton to some part of the GUI
   HandleButtonPress buttonPressManager = new HandleButtonPress();
   myButton.addActionListener(buttonPressManager);
Now, every time the button is pressed, the actionPerformed method of our instance of HandleButtonPress is called. If we so desired, we could add many more listeners to the button, each of which would be independently called when the button was pressed.
GUIs in C#
GUI design in C# is similar to GUI design in Java. One key difference is that C# GUIs use delegates (C# function pointers) to handle callbacks. So, to handle a button click, instead of implementing an interface that contains an actionPerformed method, we will instead pass into the button a delegate containing the function that we want to call (which could be named anything that we like). As in Java, there can be multiple listeners added for every button
  Button b = new Button();
  b.Text = "Button Text";
  // Add button to GUI
  b.Click += System.EventHandler(myFunction);

  ...

  void myFunction(object sender, EventArgs e)
  {
     // method to handle button click
  }
We will be using similar concepts to create our menu system, though we will not go so far as to write a complete event handling system just to process simple menus
Simple Menus
The simpliest menu consists of just a series of choices that the user can choose between. We'd like to separate our menu code from our game code as much as possible, so that we could reuse the same menu code from game to game. We'd also like to make the menu code easily extensible, so that we could add menu animations easily. Let's look at a very simple menu system, that allows us to select items:
What ar the elements required for such a menu?
- Place text on the screen for the title, menu items, be able to emphasize text elements
- Change highlighed menu item and select it
- Implement the code required for that menu item
So, first off, we will need to be able to manipulate text items -- we want to be able to change their color, scale, and position. So, we can create a class that handles text objects:
  class TextSprite
    {
        public Vector2 Position { get; set; }
        public float Scale { get; set; }
        public float Rotation { get; set; }
        public Color TextColor { get; set; }
        public SpriteFont Font {get
        {return mFont;}
            set
            {
                mFont = value;
                if (Text != null)
                {
                    mOrigin = mFont.MeasureString(Text) / 2;
                }
            }
        }

        public string Text
        {
            get
            {
                return mText;
            }
            set
            {
                mText = value;
                if (mFont != null)
                {
                    mOrigin = mFont.MeasureString(Text) / 2;
                }
            }
        }

        public TextSprite(string text, SpriteFont font)
        {
            mFont = font;
            Text = text;
            Position = Vector2.Zero;
            TextColor = Color.White;
            Scale = 1;
        }


        private SpriteFont mFont;
        private string mText;
        private Vector2 mOrigin;


        public void Draw(SpriteBatch sb)
        {
            sb.DrawString(Font, mText, Position, TextColor, Rotation, mOrigin, Scale, SpriteEffects.None, 0);
        }
    }
And another class that handles collections of text objects
   class SpriteBin
    {
        List sprites;

        private SpriteFont _font;
        public SpriteBin(SpriteFont font)
        {
            sprites = new List();
            _font = font;
        }

        public TextSprite AddTextSprite(string content)
        {
            TextSprite s = new TextSprite(content, _font);
            sprites.Add(s);
            return s;
        }

        public void Draw(SpriteBatch sb)
        {
            foreach (TextSprite sprite in sprites)
            {
                sprite.Draw(sb);
            }
        }

    }
Now, display / modify text, we only need to create a TextSprite with the appropriate properties, and add it to a SpriteBin so that it gets drawn appropriately. So, our menu just needs:
- A list of TextSprite object / Action pairs
- Index of the currently highlighted menu entry
- Method for changing which entry has been highlighted
As the highlighted element changes, we need to set the color and size of the newly highlighted item, and the newly unhighighted item. When the menu item is selected, we need to execute the code associated with that menu item
Menu Item
    class MenuItem
    {
        public TextSprite text;
        public Menu.MenuItemSelected action;

        public MenuItem(TextSprite sprite, Menu.MenuItemSelected action)
        {
            this.text = sprite;
            this.action = action;
            text.TextColor = Color.White;
            text.Scale = 1.0f;
        }

        public void Select()
        {
            text.TextColor = Color.Red;
            text.Scale = 1.5f;
        }
        public void UnSelect()
        {
            text.TextColor = Color.White;
            text.Scale = 1.0f;
        }
    }
Menu
class Menu
{
public delegate void MenuItemSelected();
private SpriteBin MenuSprites;
public const int MenuCenterX = 520;
public const int TitleY = 75;
public const int StartElements = 200;
public const int ElementDelta = 75;
public bool Enabled { get; set; }
public MenuManager Parent { get; set; }
private TextSprite Title;
private int currentElement;
private List
So, to create a menu, you just need to:
- Create a new Menu class
- Add a number of menu elements (text and an action to perform)
- Call the Update / Draw methods of the menu every frame
Lambda Expressions
Often, when a menu item is called, you will want to do something very simple -- set the value of a variable, start a game, quit out of the current game, and so on. We may not want to write an actual method of a class to do this simple task -- instead we could use lambda expressions. A lambda expression is (essentially) a way to create an anonomous delegate
A lambda function is of the form (<params>) => { function body }
So, if we had a reduce function, which applied a function to each element of a list
        public static int Reduce(List list, doComputation function)
        {
            int result = list[0];
            for (int i = 1; i < list.Count; i++)
            {
                result = function(result, list[i]);
            }
            return result;
        }
We could call this reduce function passing in an anonomous add delegage, using a lambda expression:
int sumOfElements = Reduce(lst, (x, y) => { return x + y; });
This would return the sum of all elements in the list. We could also find the prodict of all elements in the list
int productOfElements = Reduce(lst, (x, y) => { return x * y; });
And, we could do somehting fun like find the first or last element in the list
   int first = Reduce(lst, (x, y) => { return x; });
   int last = Reduce(lst, (x, y) => { return y; });
We can use lambda functions in our menu code as follows:
mainMenu.AddMenuItem("Quit", () => { { this.Exit(); });
Hierarchical Menus
Often, we will want more than just a single menu, but a list or hierarchical menus. For example, your main menu may have an "Options" item, that opens up an options submenu -- or your main menu might have a "Quit" item, that opens up a confirmation menu. Heirarchical menus are easy to implement by adding one extra element to our menus: an Enabled flag. We can create a list of menus, and only update (and draw) menus that are enabled. To switch to a different menu, we need only disable the current menu, and enable the new menu:
Menu Manager
    class MenuManager
    {
        private List<Menu> mMenus;

        public MenuManager()
        {
            mMenus = new List<Menu>();
        }
        public void AddMenu(Menu menu)
        {
            mMenus.Add(menu);
            menu.Parent = this;
        }
        public void Update(GameTime gametime)
        {
            foreach (Menu m in mMenus)
            {
                if (m.Enabled)
                {
                    m.Update(gametime);
                }
            }

        }

        public void Draw(SpriteBatch sb)
        {
            foreach (Menu m in mMenus)
            {
                if (m.Enabled)
                {
                    m.Draw(sb);
                }
            }
        }
    }
Assuming that our menu manager gets a Draw and Update call every frame, we just need to create our menus, and we're ready to go:
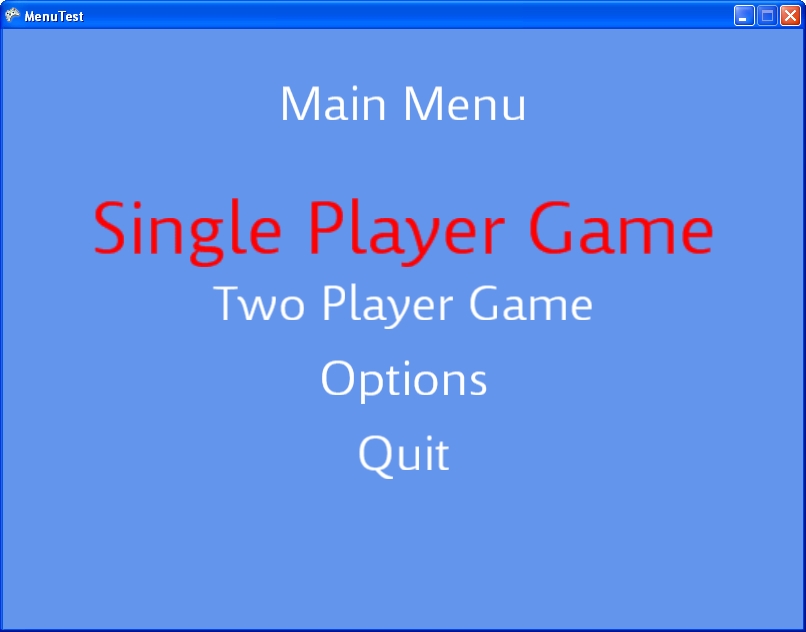
        protected void CreateMenus(SpriteFont menuFont)
        {
            Menu mainMenu =  new Menu(menuFont, "Main Menu", true);
            Menu confirmQuit = new Menu(menuFont, "Quit?", false);
            mainMenu.AddMenuItem("Single Player Game", null);
            mainMenu.AddMenuItem("Two Player Game", null);
            mainMenu.AddMenuItem("Options", null);
            mainMenu.AddMenuItem("Quit", () => { confirmQuit.Enabled = true; mainMenu.Enabled = false; });
            confirmQuit.AddMenuItem("Yes", () => { this.Exit(); });
            confirmQuit.AddMenuItem("No", () => { confirmQuit.Enabled = false; mainMenu.Enabled = true; });
            mMenus = new MenuManager();
            mMenus.AddMenu(mainMenu);
            mMenus.AddMenu(confirmQuit);
        }
Note that we could create as many different levels of menus, with as much different functionality as we'd like, by just changing the menu creation code, passing in different delegates to handle the different actions each menu item is to perform.
In-Class Assignment I
A working project that contains all of this menu code can be found here:
We want to extend this menu to allow for menu items that can set floating point values between 0 and 1. For instance if we added a menu control for controlling the volume, we'd get a menu that looked like the following:
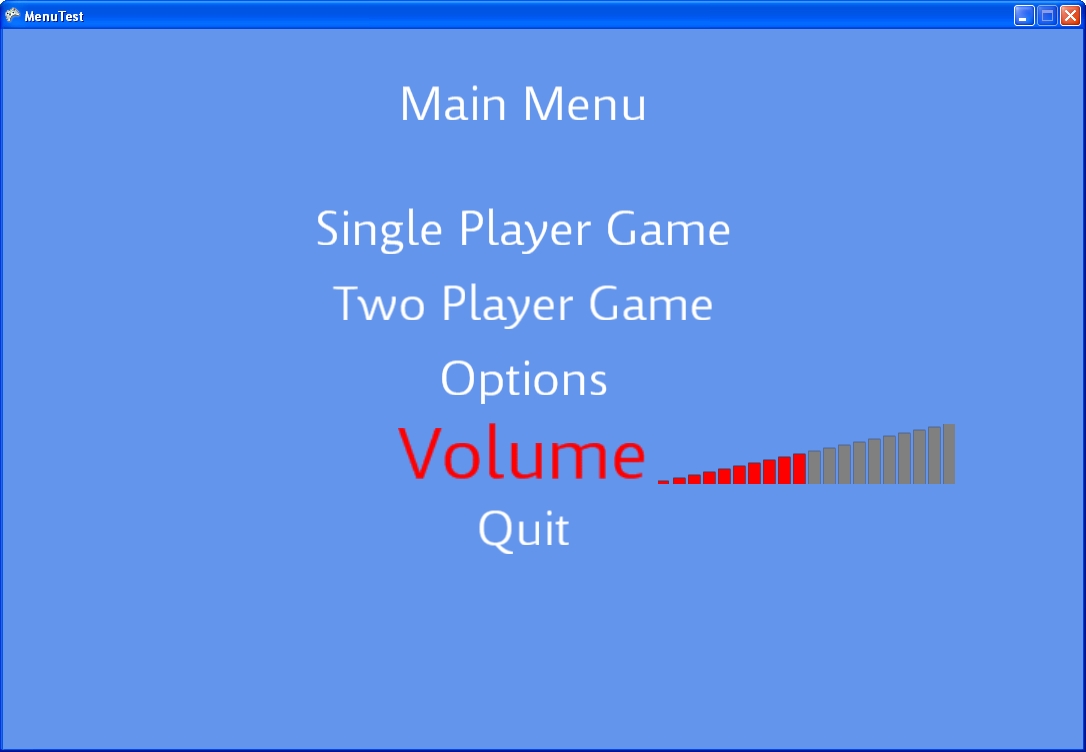
In order to make you life a little eaiser, I've inclided in the above zip file both a ProgressBar class, that helps in displaying graphically a value between 0 and 1, as well as an example graphic to use fo the progress bar. Your code should modify the mVolume varible in the game. There are comments in Menu.cs and Game1.cs where you need to add code to get this to work correctly.
In-Class Project 2: Animations
I have also included in the above zip file a simple animation package, that allows you to do very simple animations of your menu items. The animation system allows you to animate any Color, Vector2, or float value, by creating an animation. When you create a new animation, you give it parameters on when to start, how long to run, if the animation should loop, the object you are animating (and a string description of the property you are animating), a delegate to change the property, and an (optional) delegate for a callback function for when the animation is done. As soon as the constructor is called, the animation starts running, and keeps running until either it is finished, the Stop method of the animation is called, or you create a new animation on the same object with the same property string (that's why we pass in the object and property parameters)
public delegate void Apply(Color c);


public ColorAnimation(float startTime,
                      float duration,
                      bool looping,
                      Color from,
                      Color to,
                      Apply changeFunction,
                      Object objectToAnimate,
                      string property)
So, to have the text of a menu item immediately start animating from white to red over a 2-second time period, you would create the following animation:
new ColorAnimation(0, 2.0f, false, Text.Color, Color.Red, (c) => { Text.Color = c; }, Text, "color");
For the second part of your in-class assignment, add animations to you menu so that it comes alive. You can animation the positions, scale, Alpha, Color, and rotation of each menu item. If you want to animate the selecting of an item (like in the example running in the labs where a brief animation is run when quit is selected before the actual menu swich occurs) then you will need to utilize the callback parameter for animations
public delegate void AnimationEndCallback();


public ColorAnimation(float startTime,
                      float duration,
                      bool looping,
                      Color from,
                      Color to,
                      Apply changeFunction,
                      Object objectToAnimate,
                      string property,
                      AnimationEndCallback endCallback)
As always, see me with questions!
References
Much of the animation examples above were based on an XNA talk by brandf (Brandon Furtwangler) which can be found here. Have a look at his XNA blog at Microsoft if you have some spare time, it is quite good.