Working Remotely
Regardless of whether you see yourself working in a career focused on systems programming, the skills you will learn working remotely with a Unix-based OS will be extremely useful later on. It is important to pick up basic command line skills, and you should also be comfortable making changes to files remotely using a text-based editor.
This page outlines some of the techniques you can use to make your life easier while working remotely. At a bare minimum, you should be able to log into your VM from your local development machine using an ssh alias by typing ssh VMNAME. If it isn’t easy to start working, then you’ll never get started.
Text Editors
The three most common terminal-based editors you’ll hear about are nano, vim, and emacs. It is strongly recommended that you learn the basics of at least one because you never know when they’ll come in handy. nano is the easiest: it has a helpful menu at the bottom to remind you of keybindings, uses the arrow keys to navigate, etc. However, it is not very powerful without quite a bit of customization.
vim, nvim, (or their ancestor vi) is installed almost everywhere and is very powerful. If you have time and are willing to learn something new, it is definitely worth a look.
emacs is a bit more user-friendly than vim but is still extremely powerful. However, you won’t find it installed installed as often because it has a massive amount of dependencies on other libraries, and is quite large. Install on your VM with sudo pacman -Sy emacs.
micro is a modern take on terminal-based text editing, supports the mouse and several of the usual keybindings you’ll find familiar (Ctrl+C to copy text, for instance). You can install it on your VM with pacman -Sy micro.
Finally, a note. While using a terminal-based text editor is not required in class, you should consider learning the basics. Some students go all-in on vim, emacs, etc. and others stick to GUI-based editors on their local machine. Either way is fine. However, don’t let yourself get bogged down worrying so much about editors that you don’t actually work on the projects!
IDEs
Most IDEs support remote editing functionality. For instance, you can install Visual Studio Code and then install its ‘Remote SSH’ plugin. With that installed, you can connect directly to your VM and work just like you would on your local machine.
ssh Tunneling
Your VM is buried inside the CS network, which unfortunately means you can’t just connect to it directly. However, once you have an ssh alias set up, you can easily forward connections from your local machine directly to the VM by creating an ssh tunnel.
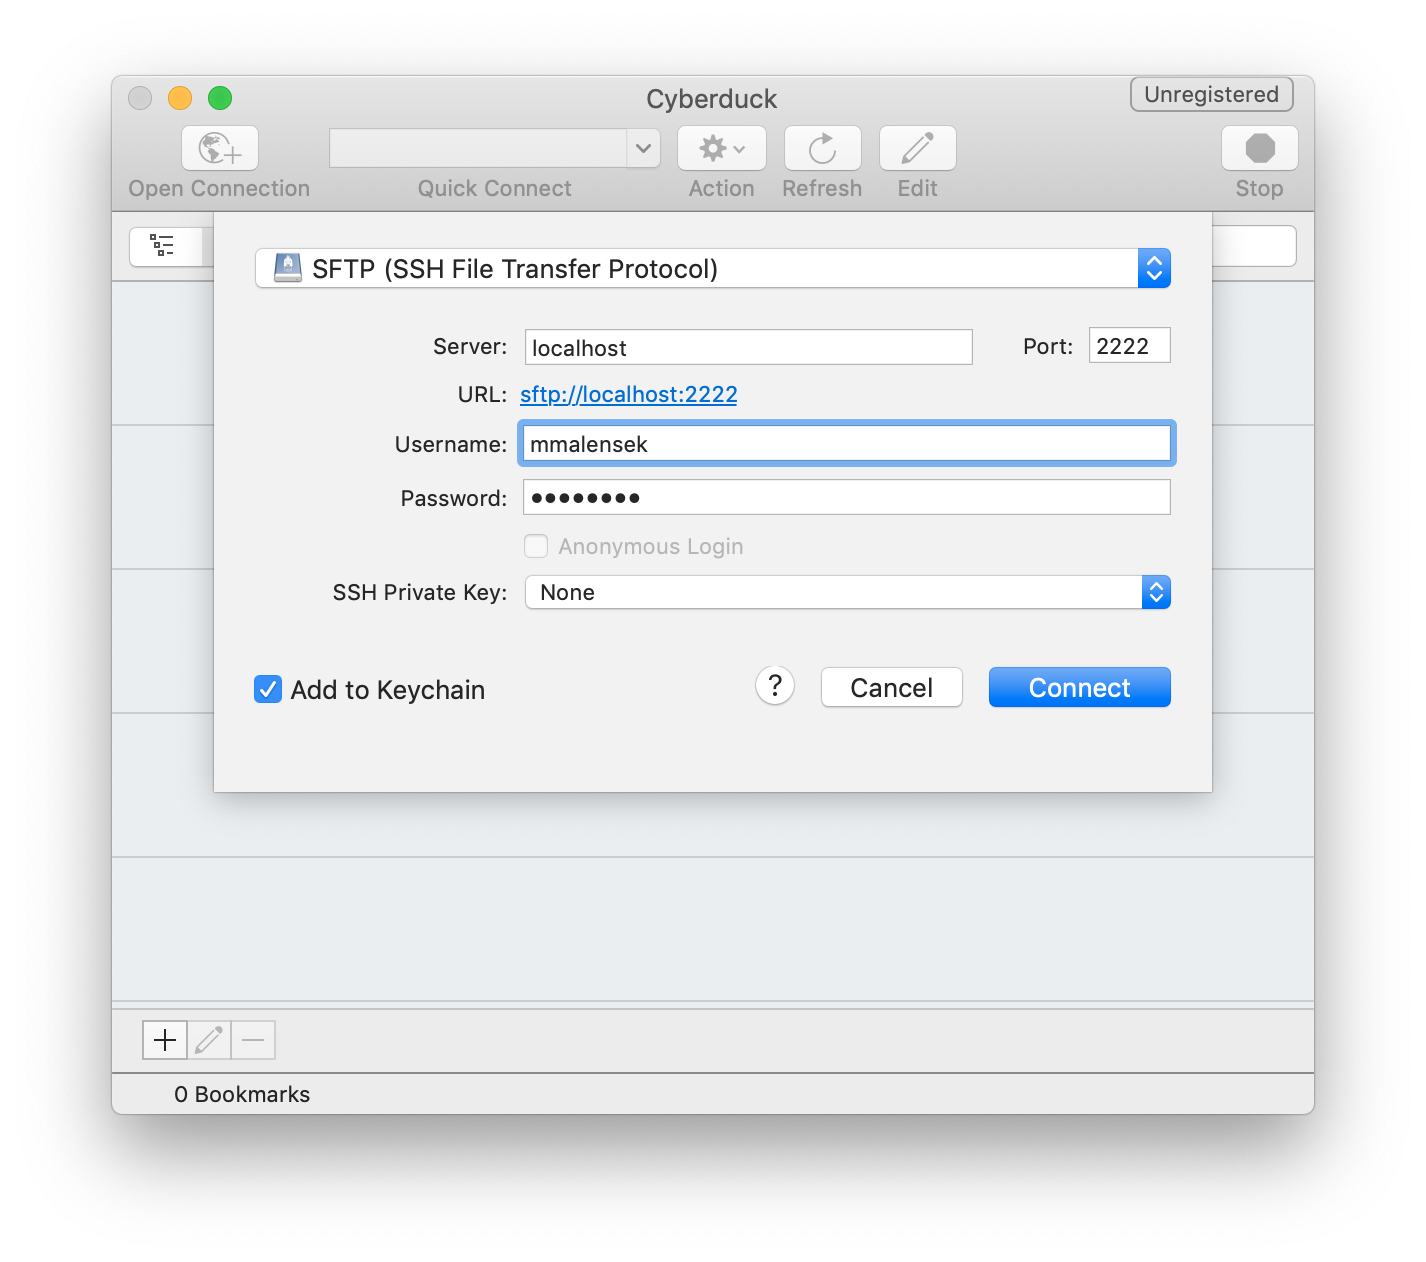
Let’s assume you want to use Cyberduck to transfer files. You can forward the VM’s ssh port to your local machine with the following command:
[matthew@silicon ~]$ ssh VMNAME -L 2222:localhost:22 'echo Tunnel ready; cat'
You don’t actually need the last part ('echo ...; cat'), but this tells you that the tunnel is ready to go. Once you’ve done this, leave the terminal window running. Now, when configuring Cyberduck, you’ll enter localhost as the server and 2222 as the port. Cyberduck will think it’s connecting to your local development machine, but ssh is tunneling the connection through the network to your VM:
There are several file transfer options available on macOS, Linux, and Windows. Once you have an ssh tunnel active, these programs simply connect to localhost:2222 and work as they usually would with any other remote server. The best part is that most of these programs allow you to sync edits between the remote server and your favorite text editor. For instance, you can “edit” the file through your file transfer program using Sublime Text, VS Code, etc.
Cyberduck is one option that works for Mac and Windows users, but can be a bit buggy at times. Here are some alternatives:
- Termius (Cross-platform) – free for most use cases, works across all major desktop and phone operating systems.
- Transmit (macOS) – $$$, but very feature-rich.
- ForkLift (macOS) – Less expensive than Transmit and you can also use your ssh alias directly (without tunneling the connection first).
- WinSCP (Windows) – Free, supports syncing directories.
If you’re a Linux user, use your file manager to connect to a remote server and enter sftp://localhost:2222. Edit just like you would any other files/folders.
Windows Tunneling
Our recommendation is to stick with WSL so you can follow the Linux/Mac directions above. However, MobaXterm and Bitvise ssh client also allow you to set up tunnels with a GUI. MobaXterm also has an integrated file manager and terminal, so you can do all your development from one application.